Today, onigiri remains a beloved snack in Japan and beyond. It’s the perfect combination of simplicity, taste, and versatility. Easy to prepare, relatively healthy, and portable, onigiri can be enjoyed as a quick snack or a satisfying meal. Plus, the variety of fillings—from classic tuna to sweet potato, pickled plums, and pork—allows for endless varieties.
Essential ingredients
One of the great things about onigiri is how few ingredients are needed to make it. A basic onigiri only requires two ingredients: rice and a filling. Even a classic like tuna mayo onigiri requires just a few extra elements—tuna, mayo, and a sprinkle of soy sauce.
For added flavor and texture, optional garnishes and wrappings can enhance your onigiri. Here’s what you’ll need:
All in all, this is it:
- Short-grain Japanese rice
- Filling of your choice
- Salt and water (for shaping and seasoning)
- Optional: nori (seaweed), sesame seeds, furikake, etc.
Preparing the rice — the foundation of great onigiri
While onigiri is distinct from sushi—no vinegar here!—it shares one key principle: the rice must be prepared properly.
First, the rice. Always use short-grain Japanese rice. Long-grain varieties like basmati or jasmine lack the necessary starch content to hold their shape. Glutinous rice, brown rice, or arborio rice will also yield different textures that don’t quite work for traditional onigiri.
Short-grain rice has just the right structure and starch content so that it can be molded, but you do need to prepare it correctly for the right texture.
Primarily, this means rinsing the rice thoroughly before you cook. This removes excess starch, preventing an overly sticky or mushy texture. Rinse the rice in a sieve under running water or in a pot, draining and repeating until the water is mostly clear. Rinsing will ensure the rice comes out soft, sticky-but-not-stodgy, and nice and fluffy.
A rice cooker is the easiest method, but stovetop cooking works too. Once cooked, let the rice cool until it’s warm but still pliable. The ideal temperature is as warm as you can comfortably handle—it makes shaping much easier.
The filling
Onigiri fillings range from traditional to creative. While there are no strict rules, some fillings are more common than others.
Some of the more common fillings are umeboshi (pickled plums), pickled vegetables, canned tuna with mayo, salmon, roe, and other seafood, meat, or veggies. We’ve seen (and loved) sweet potato, cod roe, teriyaki chicken, avocado, crab, kimchi, spam, the Okinawan specialty of pork and tamago egg — pretty much anything that could go with rice can be made into onigiri.
Within these fillings, there are also seasonings or garnishes that can enhance them even more. Soy sauce, tenkasu (little bits of fried tempura batter), katsuobushi, nori crumbles, scallions… all popular depending on the filling type.
Different styles of onigiri and how to make them
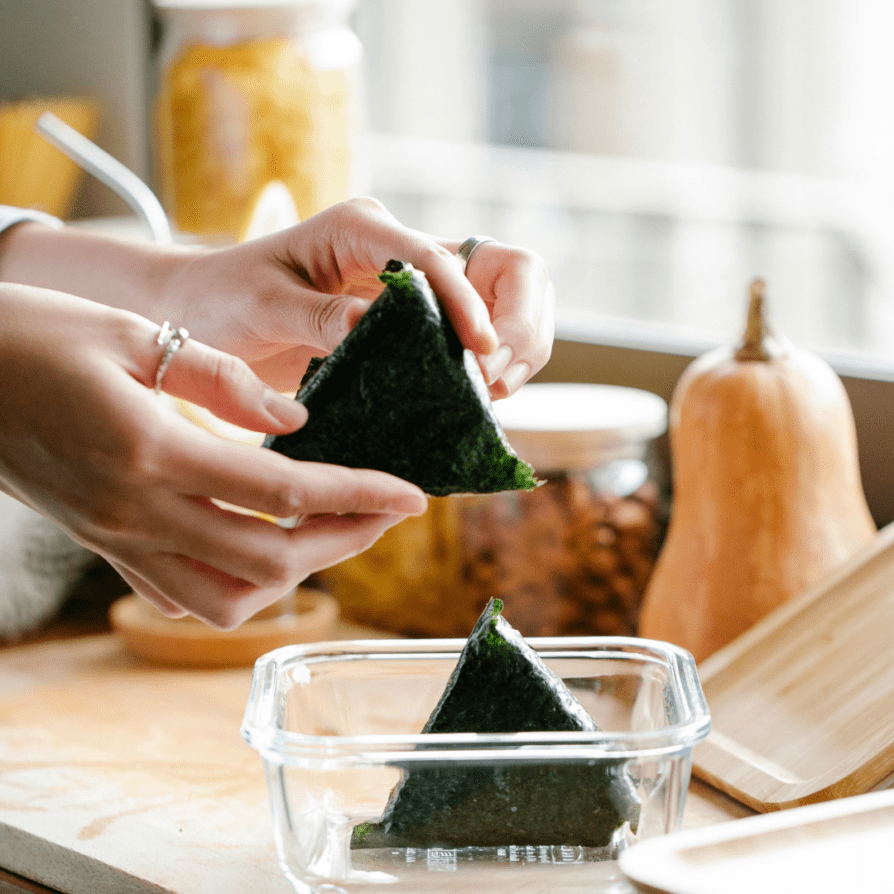
Traditional onigiri are formed into a triangular shape, but round or oval shapes are also common. To shape onigiri, you can use your hands or an onigiri mold – just fill, press and release.
When shaping by hand, it’s best to work with warm rice, as this keeps it soft and at the right level of stickiness. Before forming each onigiri, wetting your hands with a small dish of water helps prevent the rice from sticking to your fingers. Lightly salting your hands also seasons the onigiri as you shape it. Without water, the rice can cling to your hands, making the process messy and difficult.
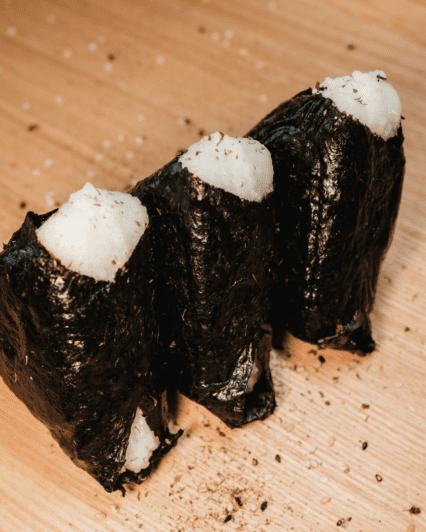
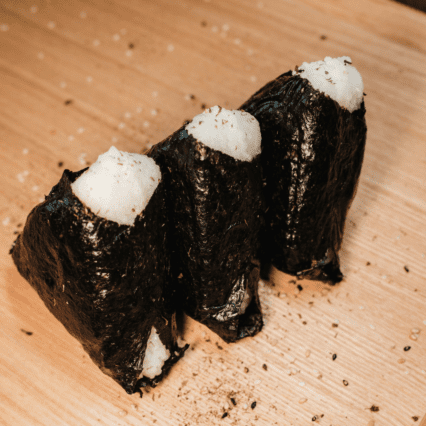
Once formed, you can take your onigiri a step further by pan-frying it to make yaki onigiri, which creates a crispy, golden crust for a delicious twist.
Wrapping and garnishing
After the onigiri is shaped, you can enhance it with a garnish for additional texture and flavor, or an edible wrapping.
For garnishing the rice, toasted sesame seeds and furikake are popular choices. These can be incorporated during shaping by mixing them with the salt water used to wet your hands, allowing them to blend naturally into the rice.
When it comes to wrapping, nori is the most common option, either partially covering one side or fully enclosing the rice. Shiso leaves are also sometimes used, offering a different flavor profile. While nori provides a rich, umami depth, shiso adds a minty, herbal, and slightly floral note.
Last thoughts
As long as you have Japanese short-grain rice, you can make onigiri with just about any ingredients you like.
While classics like tuna mayo are a great starting point, experimenting with different flavors can be a lot of fun. If you’re craving a particular dish, why not try putting it in onigiri form?
Making onigiri by hand is one of those things that’s easy to learn but takes practice to master. The first few times you make it, you might find your little rice balls are a bit awkward in shape, or that you make a bit more of a mess with the rice — learning it is all part of the fun. And in the end, an imperfect onigiri is just as delicious.